It is getting closer to THAT time of the year, the time when we look to fairy lights, magical sparkle and gorgeous rich colour to festive up our environments. It is then my very big pleasure to share with you something very special from our guest blogger Corinne Milan from the UK. Corinne is a fantastic, inspirational fiber artist who’s creativity is clear as soon as you visit her Woolly Wizzard facebook page . I am honoured to be sharing Corinnes tutorial with you here as our fibery guest!
A Wensleydale Christmas Wreath
by Corinne Milan
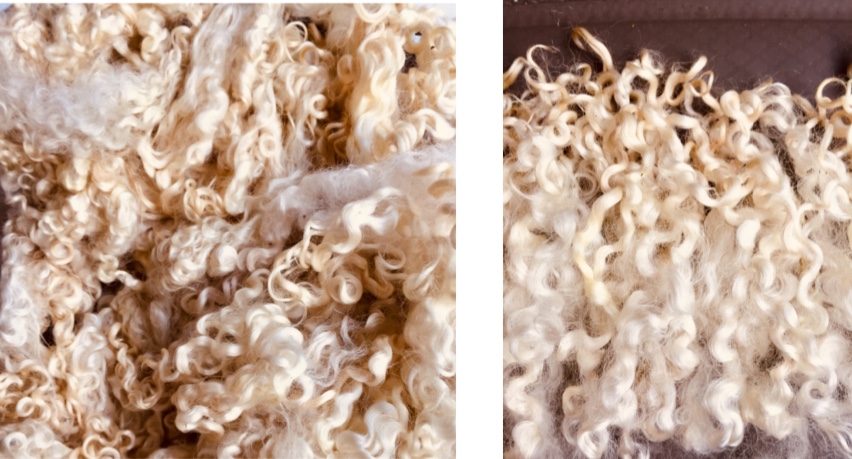
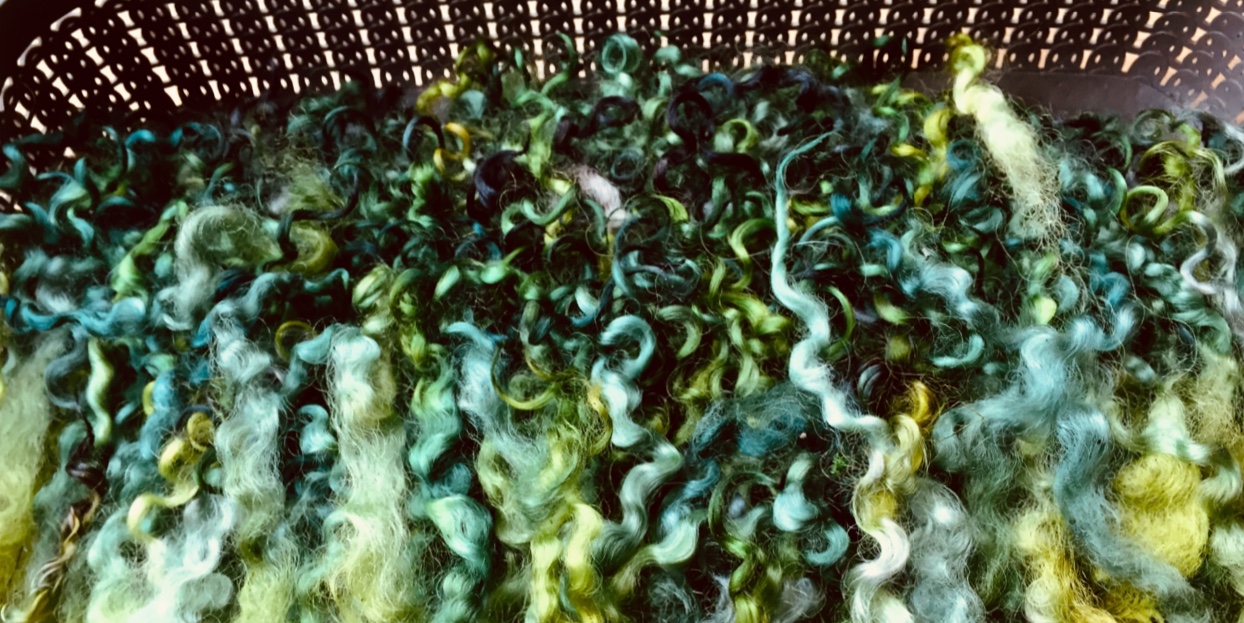
Wensleydale sheep have long curly fleeces which I like so much that I have accumulated a large stash of Wensleydale curls.
My aim with hand spinning is always to keep the character of the sheep, if it is a straight coat, I spin a smooth traditional yarn, but if a sheep has a long curly fleece I spin an art yarn which keeps the locks intact. The best way of doing this is tail spinning.
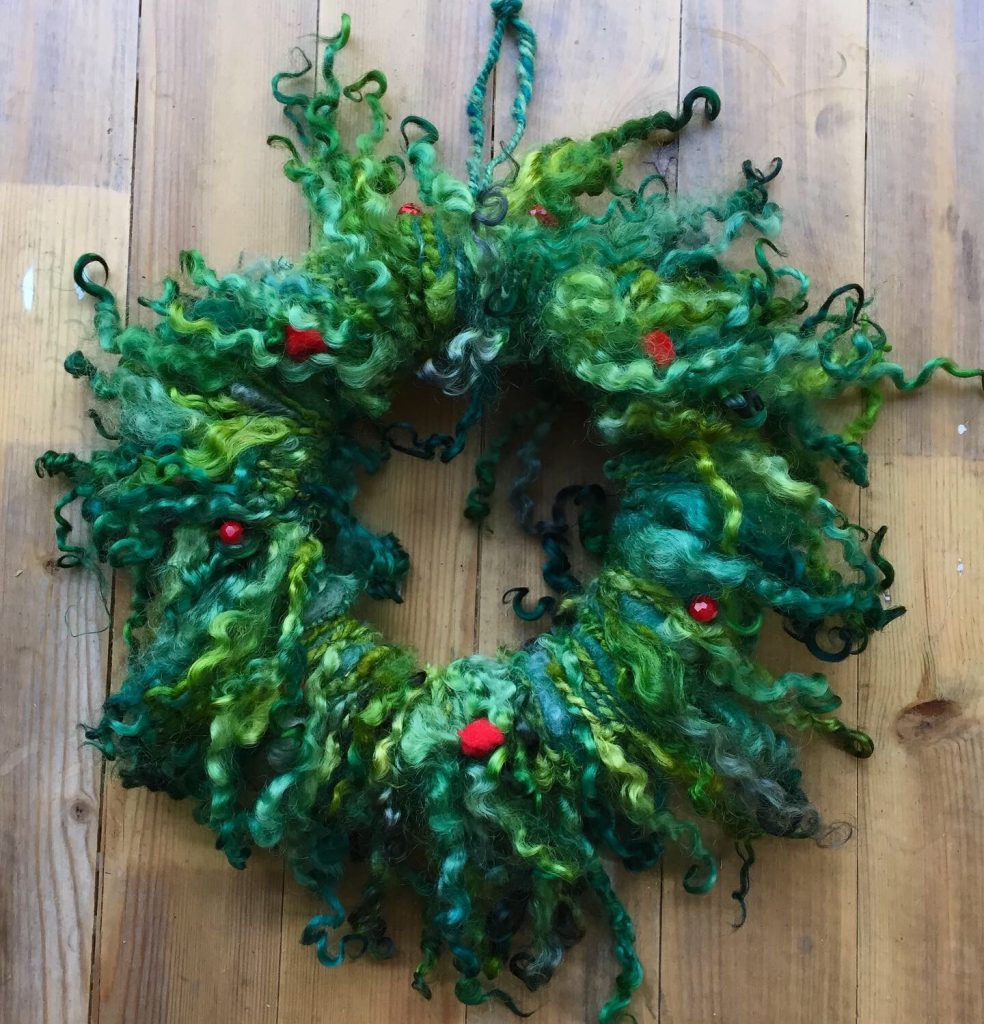
I’m aiming to have a festive corner in my Open Studio this Christmas time, so here is an idea I’ve had of what to make with curly Wensleydale fleeces, apart from knitting curly collars or adding fringes to shawls. It s a Christmas wreath of dyed green Wensleydale locks spun and twisted around a ring, to make a novel and lasting spinners version of traditional wreaths of holy foliage and berries.
You will need:
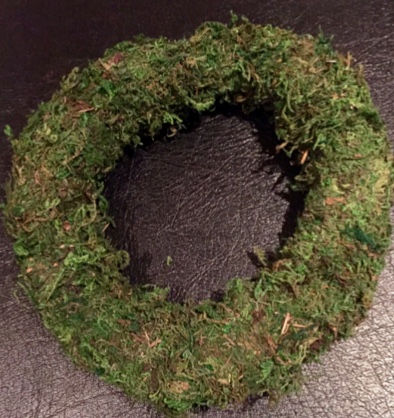
- A ring from your local florist
- Green Dye
- A microwavable container
- Bright decorative beads (I used red to imitate holly berries)
- Curly Wensleydale locks
Method
- Wash and dry the fleece
- Place the locks in a shallow microwavable container, all facing the same way. Dye the locks with green dye, graduating from light green where the cut locks are, going darker towards the tips.
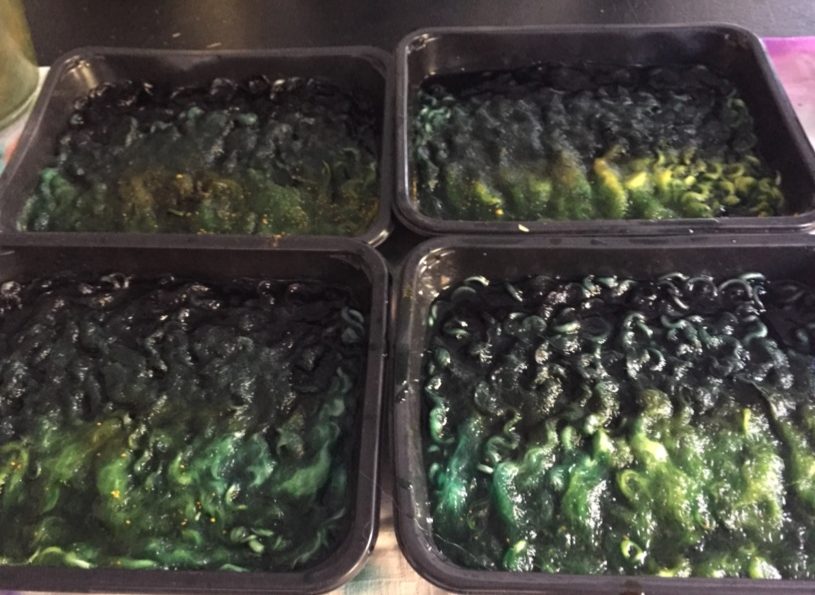
- Place the container in the microwave for about ten minutes on full power. The timing is approximate, you may require a longer time for the locks to absorb the dye sufficiently.
- Rinse the dyed locks and squeeze out as much water as you can, leave to dry.
- When it is completely dry, tail spin a single yarn and ply it with a silk thread (if you have not tried this before, see Suzy’s Tail Spinning Video tutorial here)
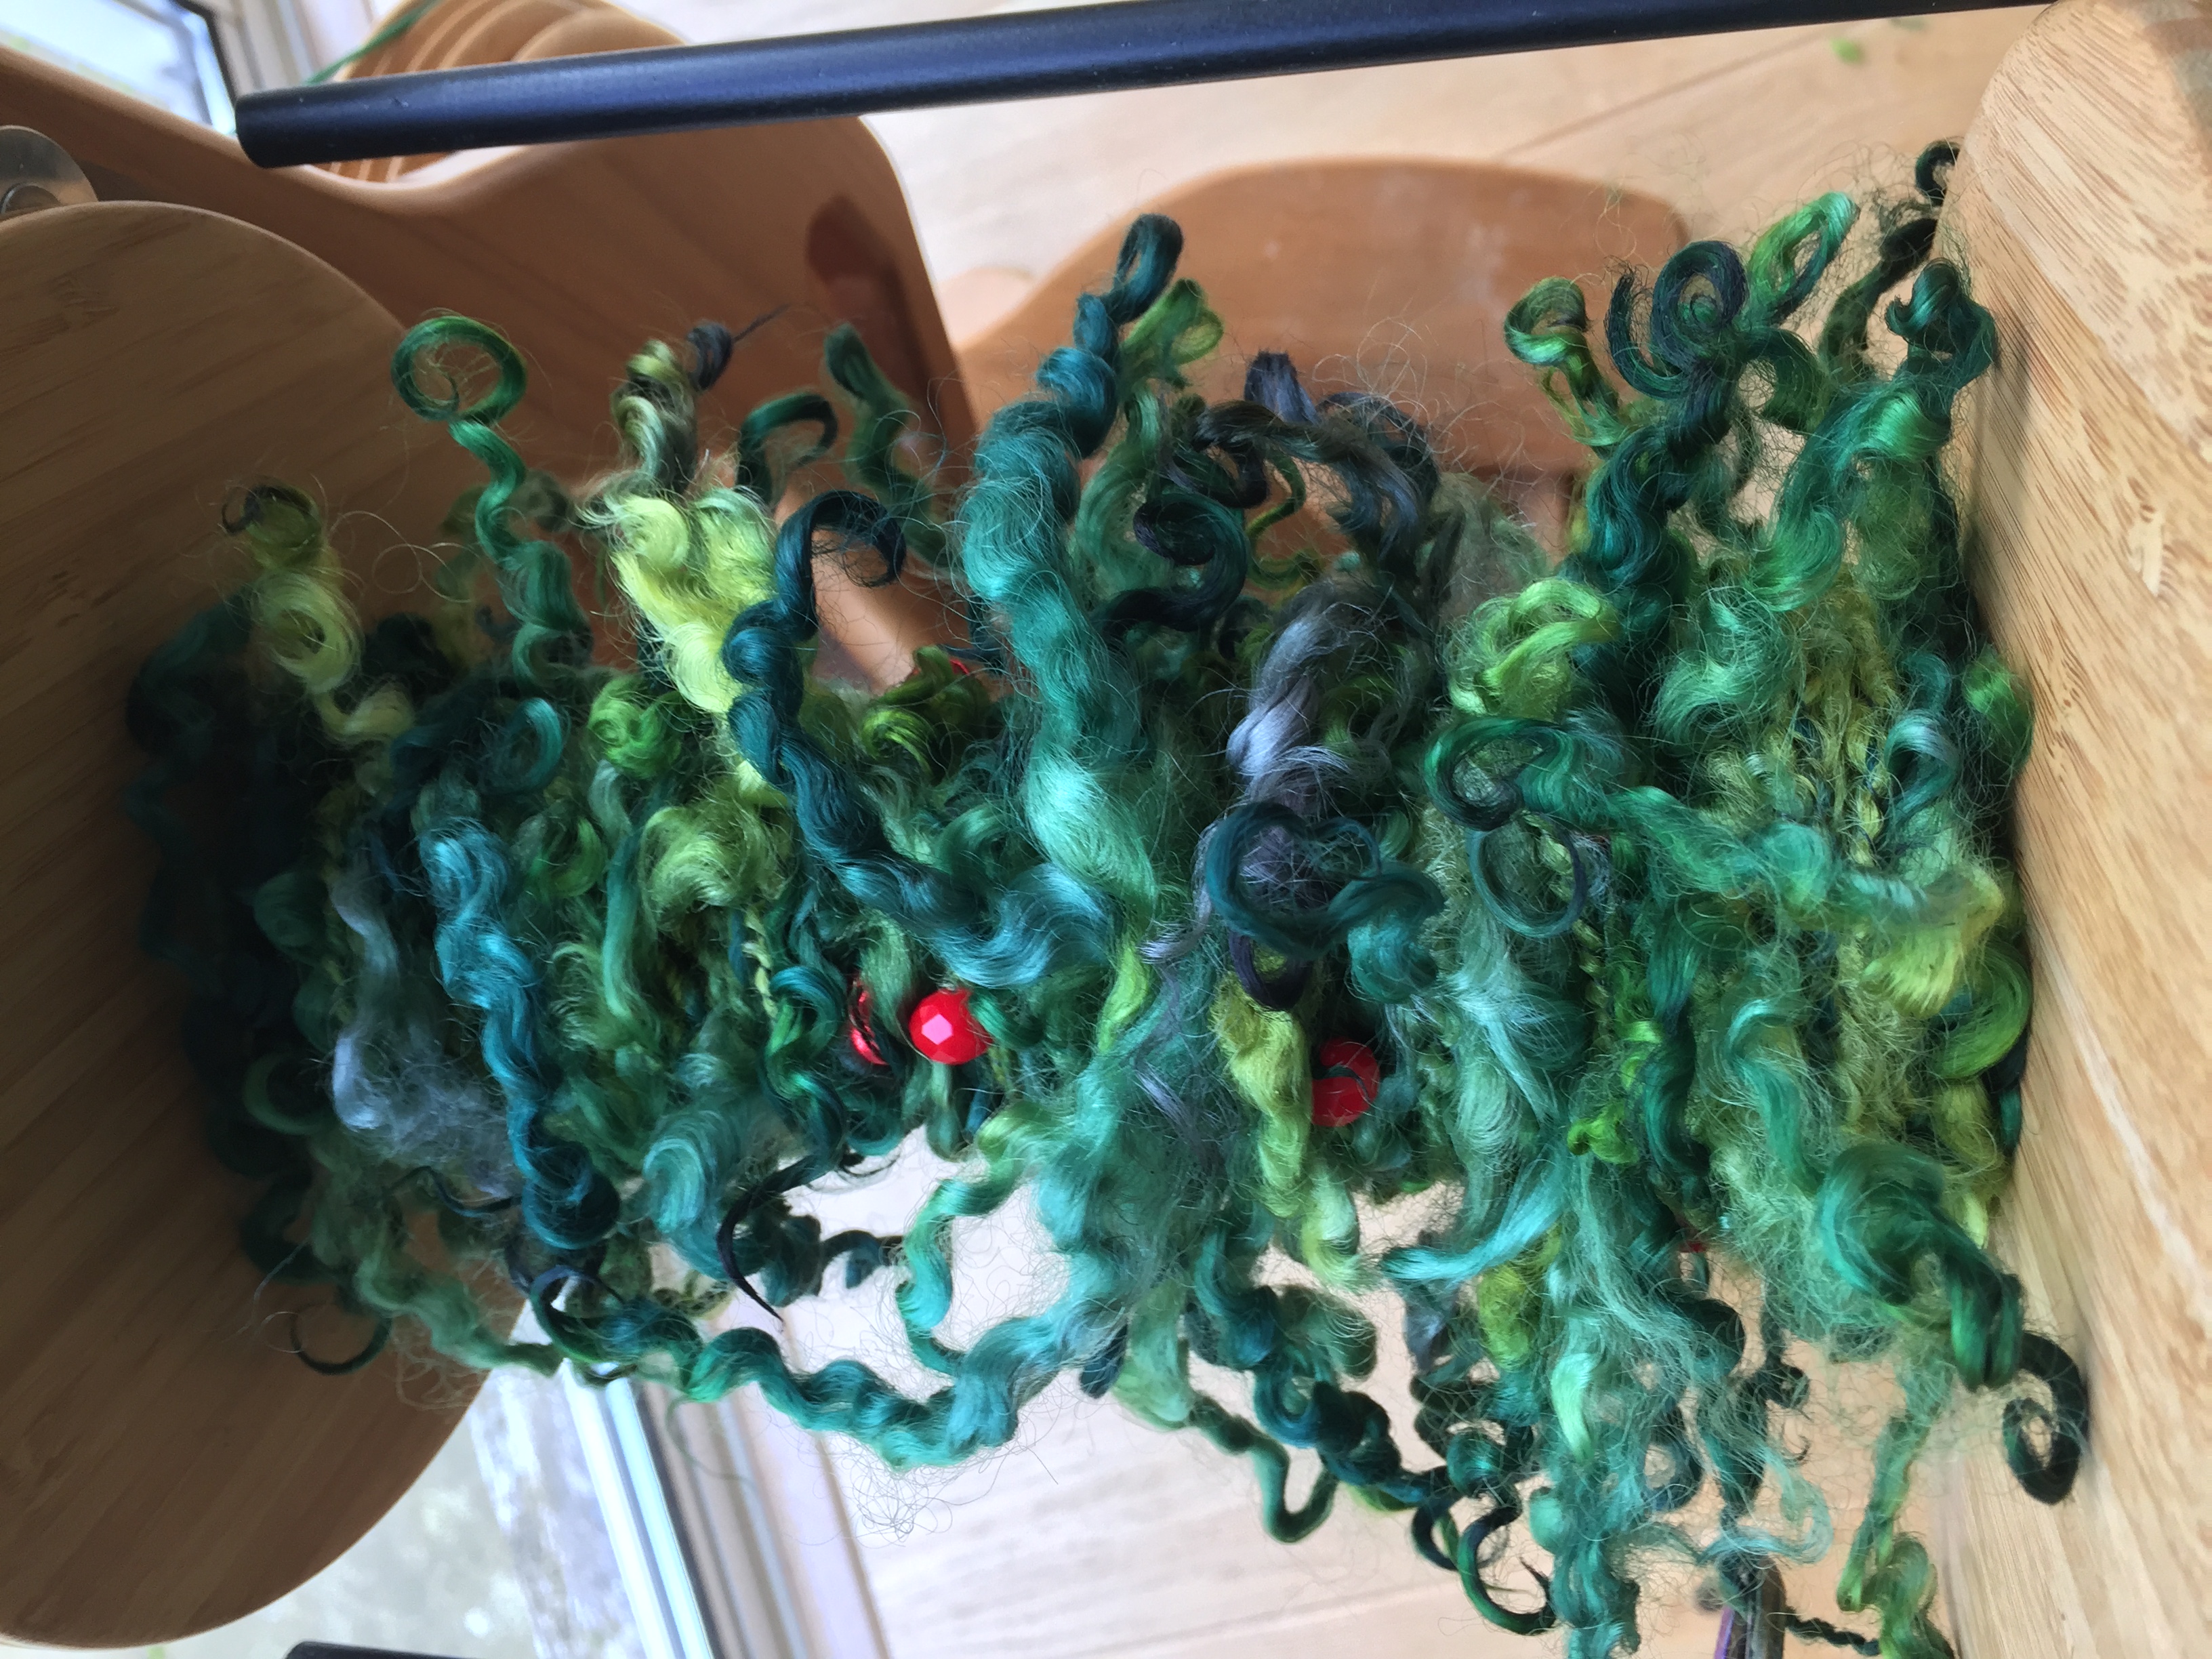
- The amount you spin depends on the size of your ring. To get a rough idea of the length you will need, you can wind a piece of yarn or string around your ring with a spacing of about and one and a half inches (3.5cm) between your yarn wraps, once you are all the way around the ring you can take it off and measure the length. You may need more or less also depending on how thick your yarn is, but you can spin more if you need it!
- The decorative beads are best threaded onto the resulting plied yarn before assembly, but could be attached separately if preferred.

Now start assembling the wreath
- To achieve the round shape. use a ring from your florist. Wind the yarn around the ring until it is completely covered.
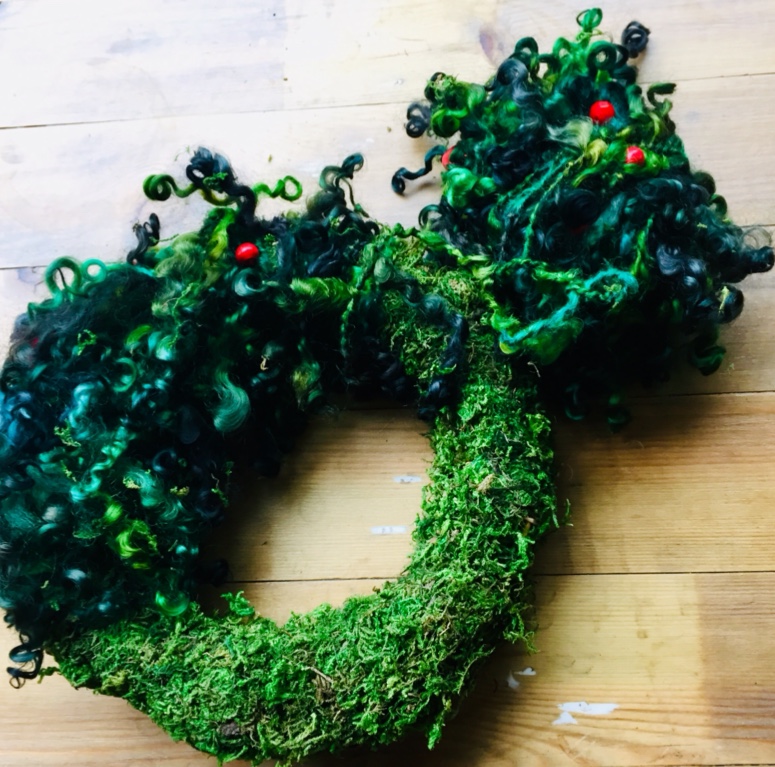
- Adjust the position of the beats so that they show on the front of the wreath.
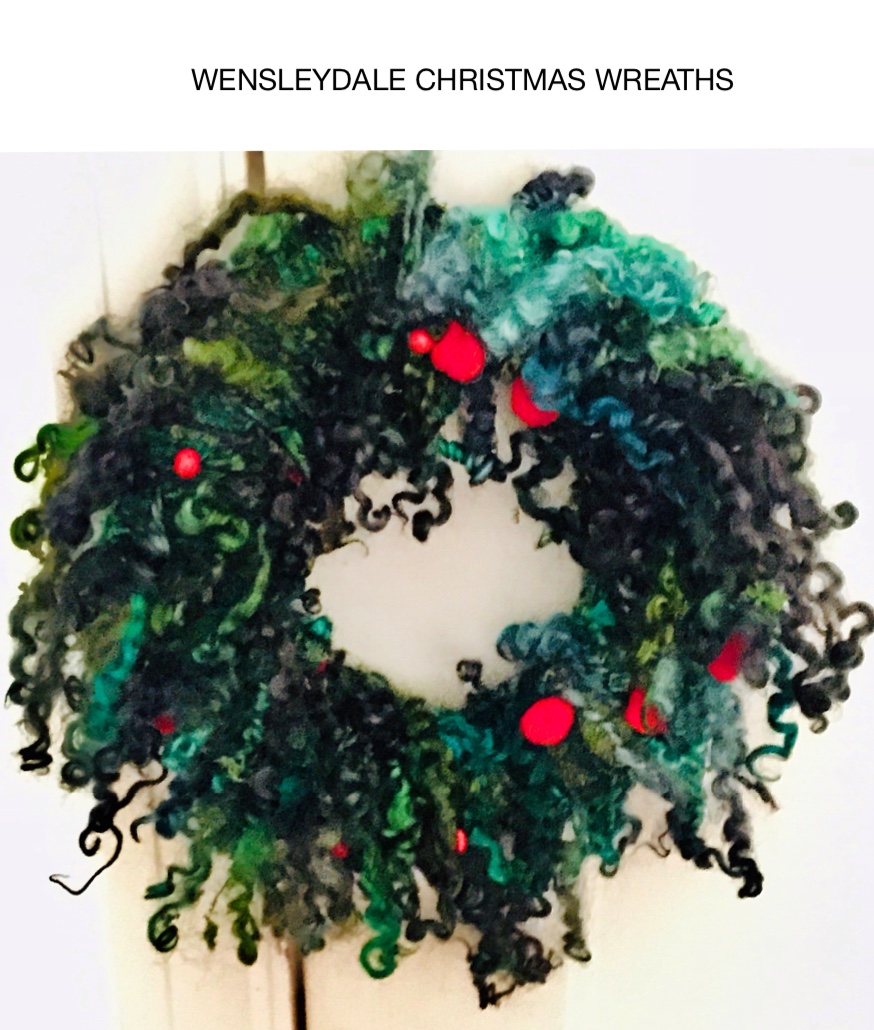
- When you are happy with the effect, attach some yarn at the top and hang it at the door to welcome your visitors!

Love this so much! My friend and I have plans to make this!